|
For a while now I have been racing on a friends combination Ninco/Scalex track. Great track, but I found I was having
quite a problem running my TSRF chassis on the track.... Chassis runs great on the middle lanes but on the lanes with the
tight inner most truns the chassis would stop... The inner turns are too tight for the guide pin set up on the chassis...
I found this very frustrating, as the TSRF chassis is great on the plastic tracks.. Fast, great handling and
a real butt kicker to most all of the RTR cars that we run... Runs like a dream on my routed track too
:-)
So what I needed to do was find a way to put a "normal" guide flag on the chassis... After studying the chassis for a
bit I have found a neat, simple way to add a Slot-it guide flag to the chassis.. It really turned out to be much easier than
I thought it would be.....
|
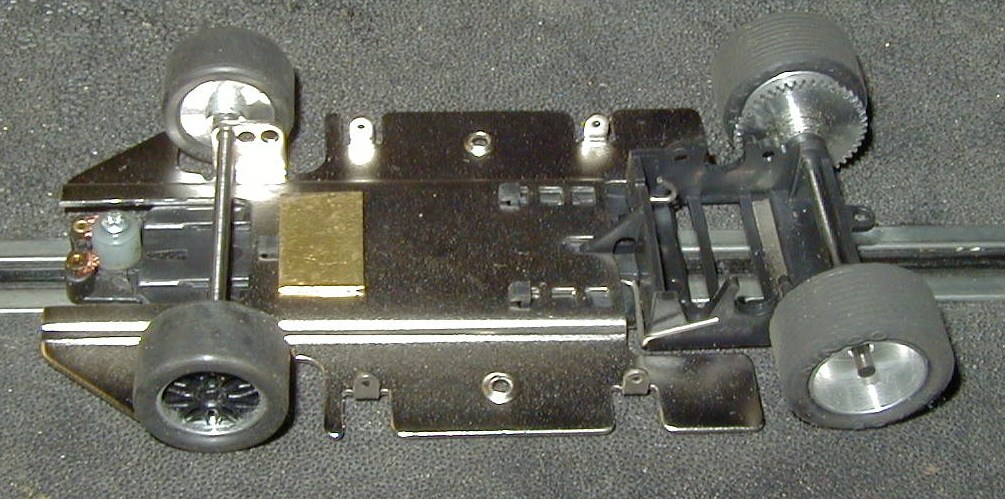
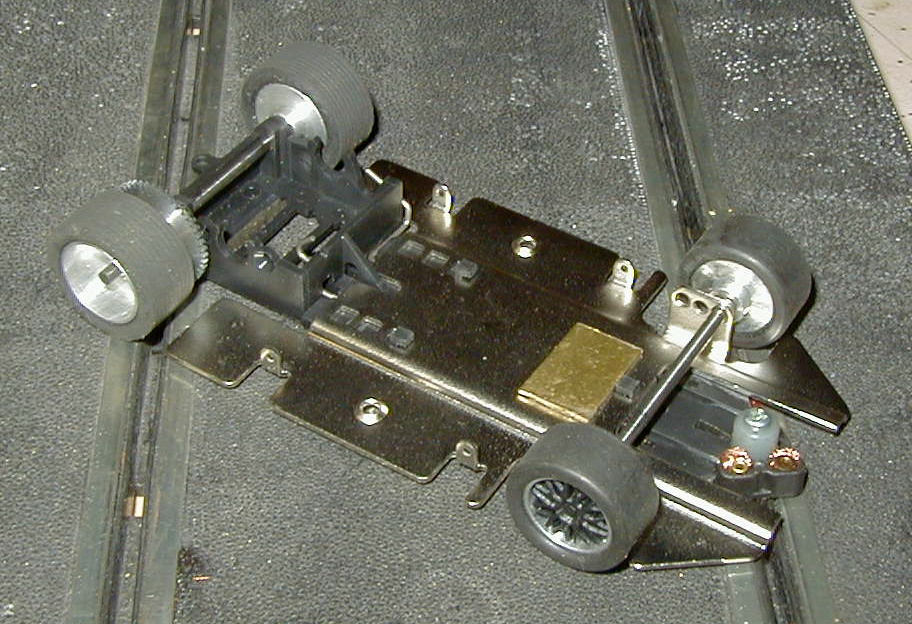
| TSRF chassis with Slot-it guide flag |
Tools needed:
Dremel tool and cut off wheel
9/64 drill bit ( no drill needed, you want to do this by hand )
Round rat tailed file
Flat file
----------------------------------------------------------------------------------------------
Parts needed:
Slot-it guide flag ( I like to use the Universal Screw Mount flag
part # SICH07..... I don't like using the pop in guides because they all end to wobble and are loose in the mount...
With the screw mount you can tighten it down and remove any wobble in the guide)
or
Slot-it routed track guide part # SICH10
That's all you need boys and girls :-)
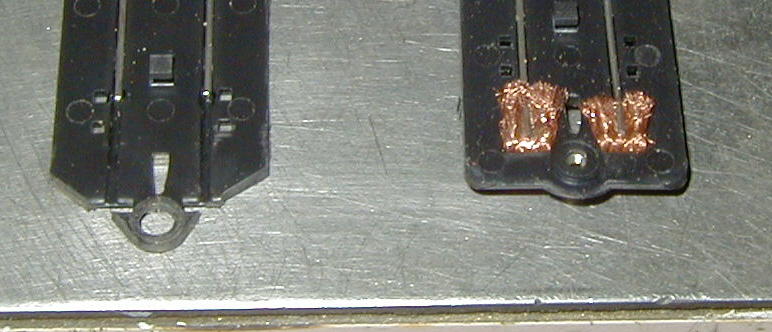
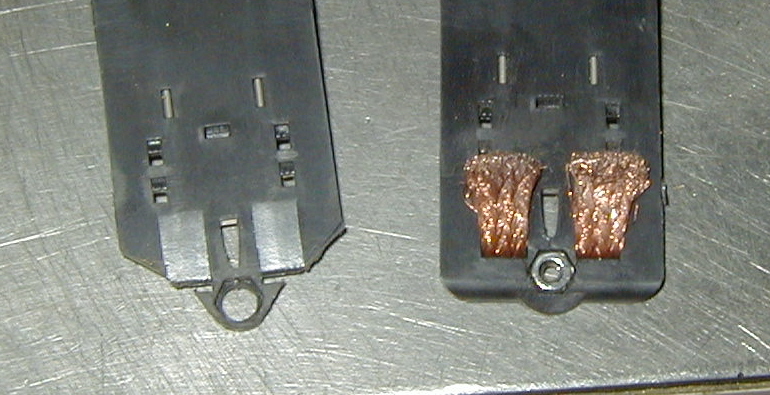
After looking the chassis over for a bit I found that if you take a 9/64 drill bit and drill out the hole the the nut
sits in, and then ream that out a bit with a rat tailed file. That the post of the Slot-it guide will fit right in...
Now with the dremal cut the chassis at a angle (I can't tell ya what angle I just did it by eye) This will set
the guide swing to what ever limit you angle is set for.... Now take the flat file and clean things up and make sure the front
of the chassis will let the guide trun freely...
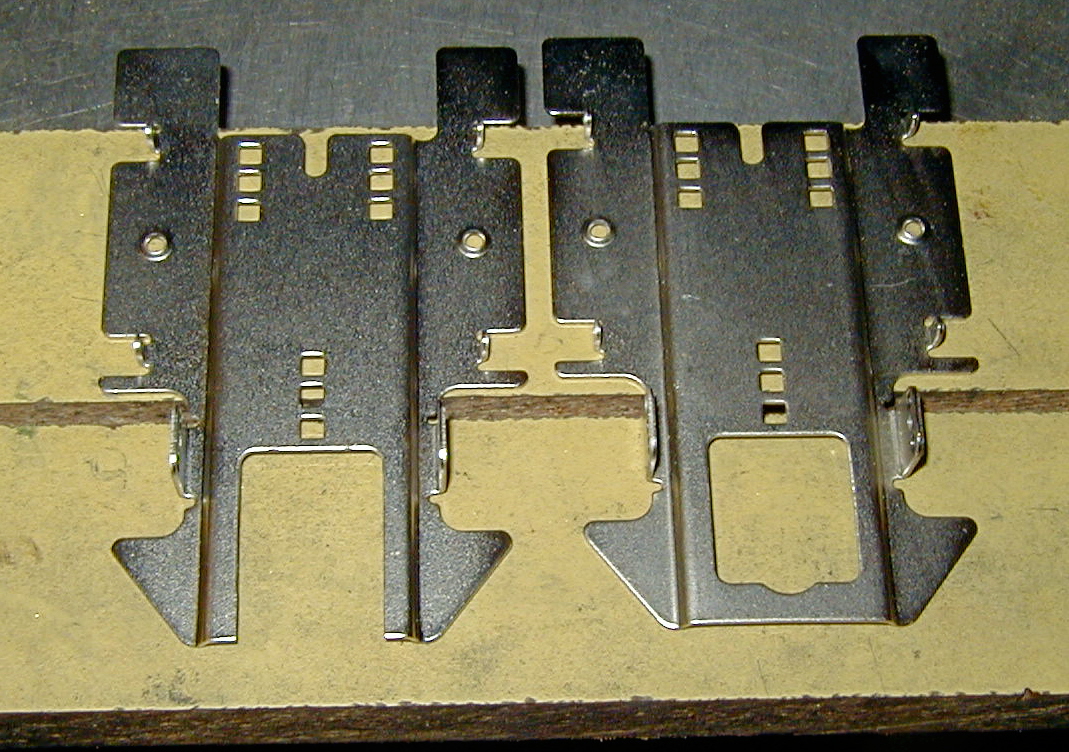
Now for the metal part of the chassis.... All you need to do is make 2 straight cuts to take the very front of the chassis
off.....
Well, that's about it :-) all you need to do now is put the chassis together and then put a STOP behind the
first tab in the chassis.... This stop is needed to keep the chassis from coming apart...... For the moment I am using
a piece of brass that I have just stuck on the chassis with double backed tape... You could hot glue it on, solder it on..
but keep in mind that if you want to change the chassis over to another body, you may need to take it apart to make the chassis
longer....
And as you can see you have plenty of movement with the guide to allow the car to silde.....
Oh, and some of you may have noted the white nylon washer on the guide.... I use this to take up the space that I end
up with with the high neck on the guide post.... It also lets me fine tune the guide flay and take out any wobble... the washer
is just a nylon spacer for 1/8" axles....
Hope yours turns out well..... Any questions feel free to email me......
Chris....
|