|
|
| Hold motor in place and scribe around it to make the motor cut out |
|
| motor cut out...... |
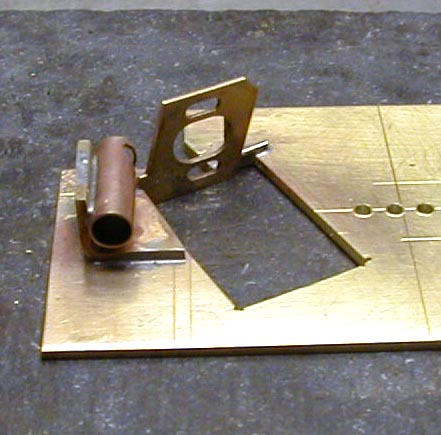
Once you have the cut out for the motor done you can place your L-brace in position and in my case with the motor bracket
I am using I have to cut a slot in the brace to accept the motor bracket...... Then I solder in the L-brace and the motor
bracket......
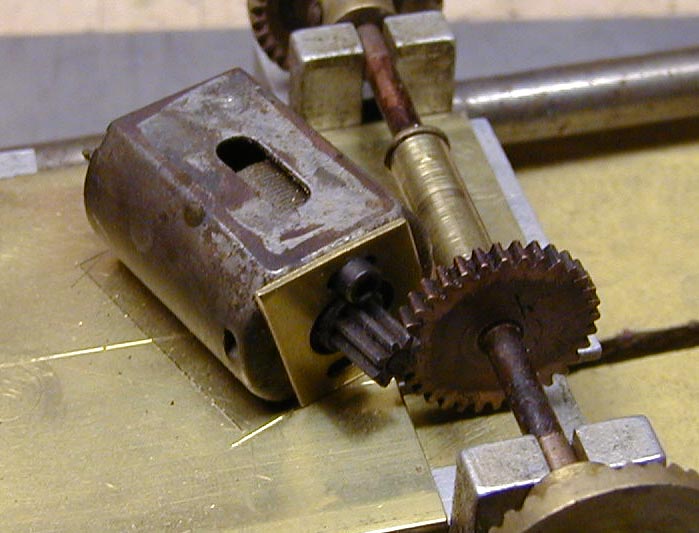
Now all of my soldering is done with a propane torch.... So I always use metal gears and and old motor to hold the motor
bracket in place while I solder it in.
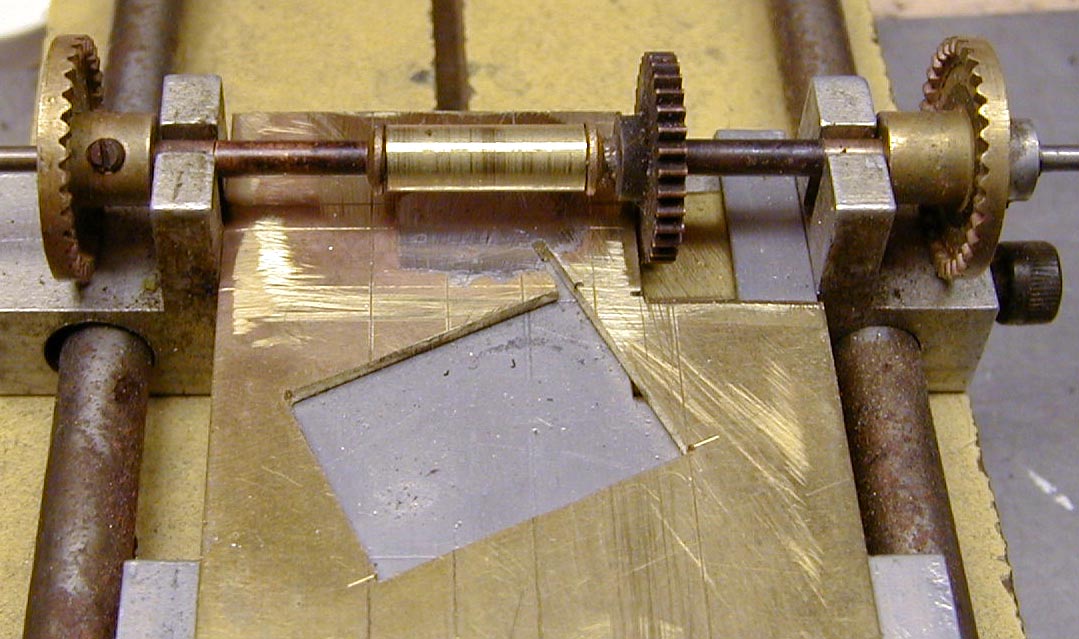
Again before you start soldering in the motor bracket make sure the gears are set
up to mesh........
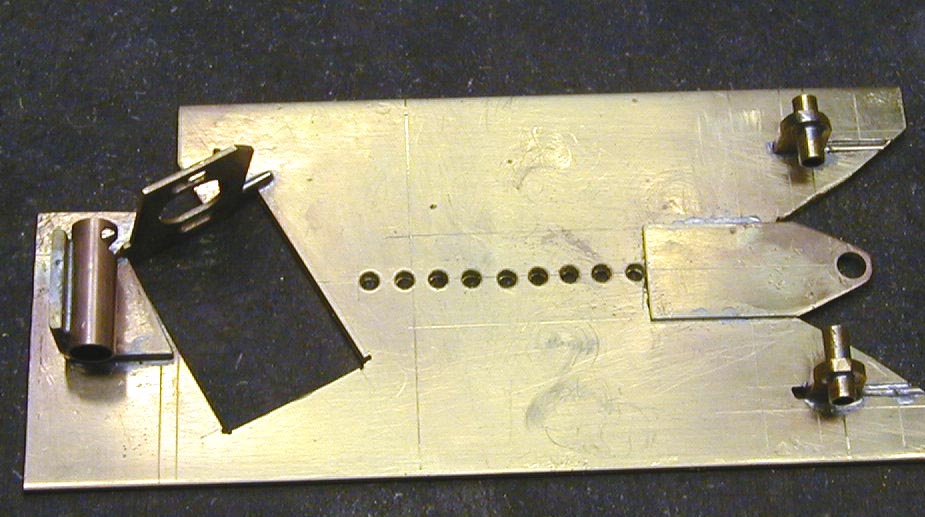
Finished rear axle carrier and motor bracket set up in the chassis.........
At this point I am ready to cut out my front end so I can place my guide holder in position........ the cut
out will very depending on how much room you have under the nose of the car.......
I then mount my front axle carriers... in this case I used pillow block but to make it easier you can use a 1/4"X
1/16" thick brass stock bent into a L bracket to do the same thing...... (Like I did on the rear axle carrier)
I then make up my front guide holder and mount that to the chassis..... From here I use the center line I marked
earlier and use a punch to mark out where I want to drill a series of 3/32 holes in the chassis...... The holes
just make it easier and quicker to use the Dremal and cutting disk to cut out the slot needed for the center square stock
I will be soldering into it.......
|