|
On March 31, 2001 the Hobart Miniature Car Club ( see links to contact site ) Hosted the second Tiger Cup Proxy race
on their club tracks. The race this year was for F1 and Indy type cars.
I have enjoyed the proxy racing for the last few years and was excited to be able to build for this years race..
And have decided to pass on a "How to article" on the building of my two entries.
The first car that I decided to do up was a Ferrari 310B F1 car. The body was the Ninco F1 Ferrari that I was able
to get from Pendle Racing in England. Sean at Pendle is very nice and one of the few places that I have found that will sell
the Euro-car bodies separately, which is a big cost saving over having to buy a whole car just to use the body for a project
like this..
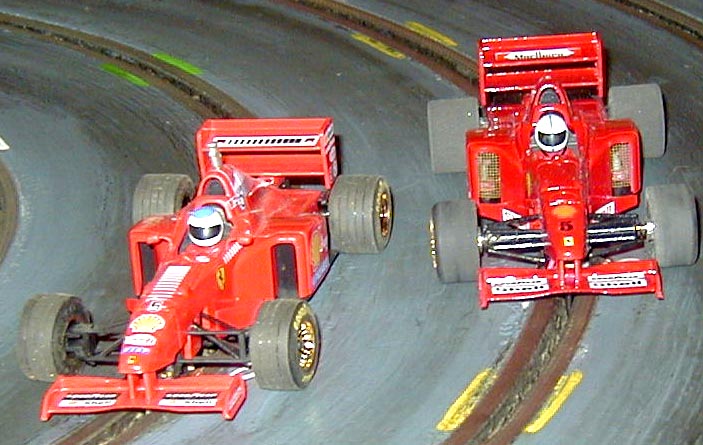
The picture about shows the Stock Ninco F1 Ferrari and the Proxy Ferrari. As you can see the Ninco Ferrari is a nice
looking car but not as RED as a Ferrari should be. So the Ferrari that I received from Pendle was stripped down and repainted
using Tamiya X7 red acrylic paint. The painting was done with my air brush which is am starting to get the hang of....
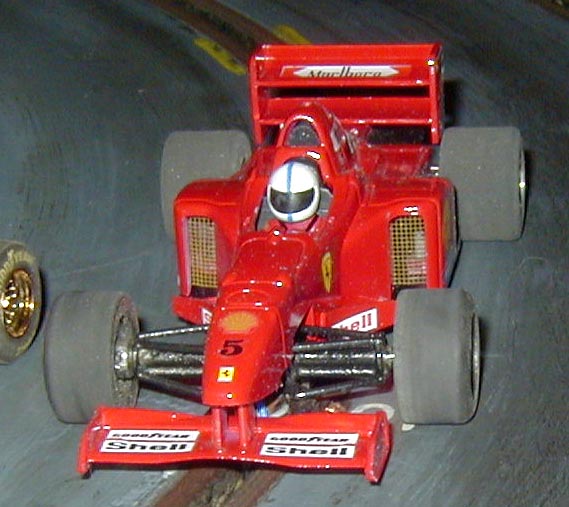
The decals used are some that I had laying around and not really the best for this project but the best that I could
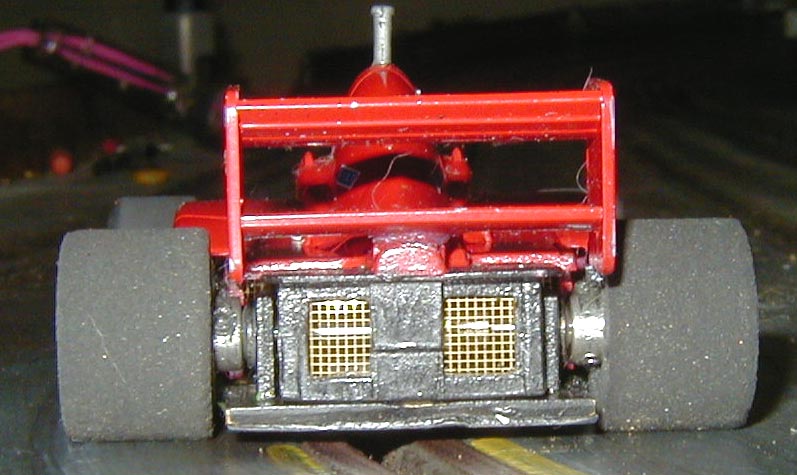
come up with in the time I had to do the car. I added some fine brass mesh for the side intakes and made up a box affair to
cover the rear of the car so the axle and gears weren't hanging out for the whole world to see..And painted up and detailed
the drive in a effort to get some concourse points in that part of the event.
Trust me when I say the body was the easy part of this project... You don't really know how little room you have
to work with on these cars till you try to put a chassis under one of these
things :-)))
The chassis for the race had to be a inline of obvious reasons.. The basic chassis design is based on a race proven chassis
that I have learned to build from a good friend of mine Russell Sheldon. Russell is a outstanding builder and designer and
a regular in the proxy races, and to this date unbeaten in competition...
.
I hope to break that streak :-)
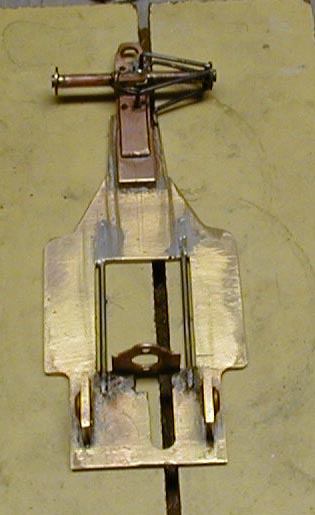
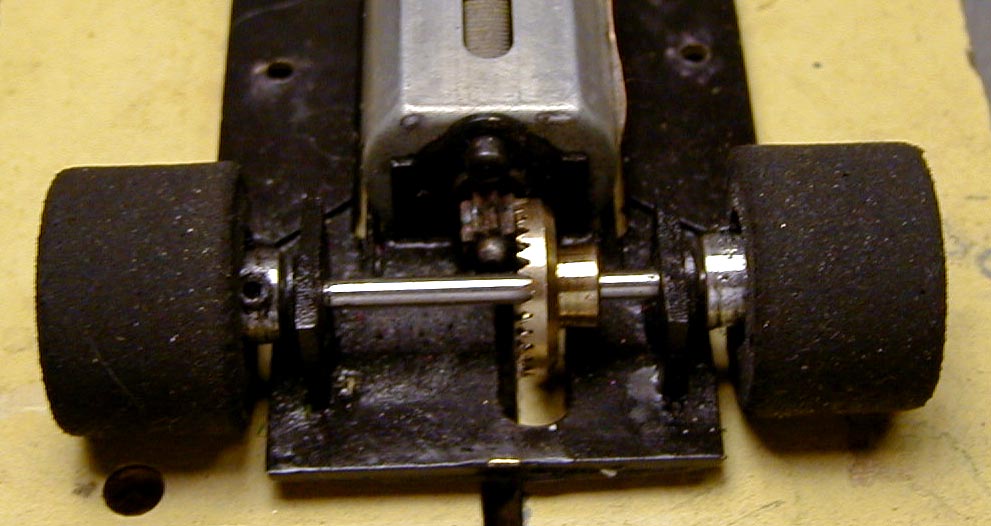
As you can see in the above photos the chassis is fairly basic. The rear axle is carried by pillow blocks and the front
is just a 1/4" wide 1/16" thick piece of brass stock bent into a L shape to hold the front axle tube. That is the only set
up I could find for the very limited amount of space up front....
The main pan was cut to shape of the Ferrari body, and the piano wire soldered to the motor bracket act to let the motor
and rear axle housing flex independently of the main chassis.. ( note: on the finished chassis there are two cuts in the chassis
to separate the motor and rear axle area form the main chassis pan )
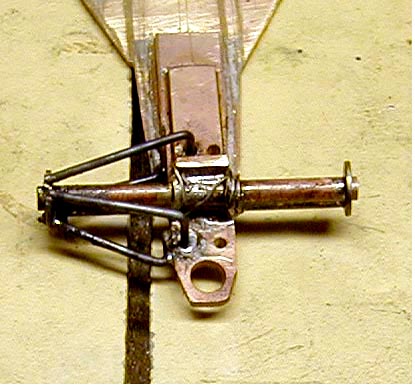
The front suspension is made from piano with and bent to shape and soldered to the front axle tube and some washers on
the ends that I hoped would look like dish brakes
The front of the car took me most of the time to build and was a real pain trying to get the parts to say in one
place long enough for me to get them soldered...
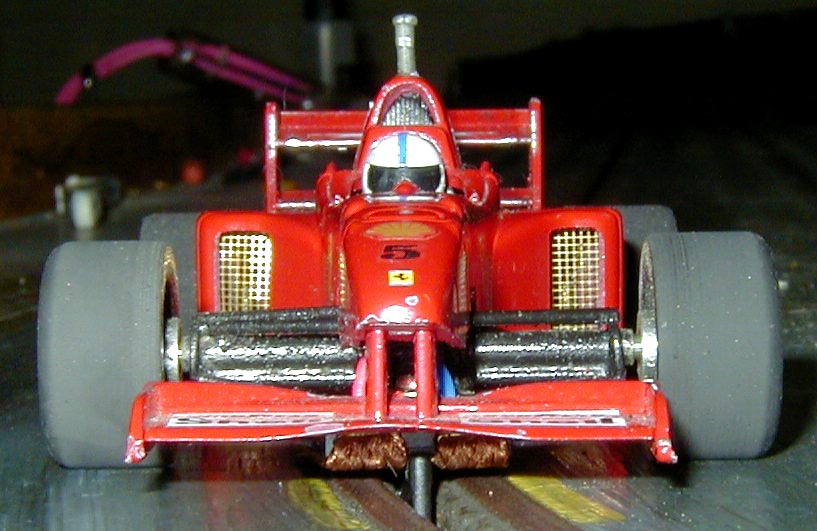
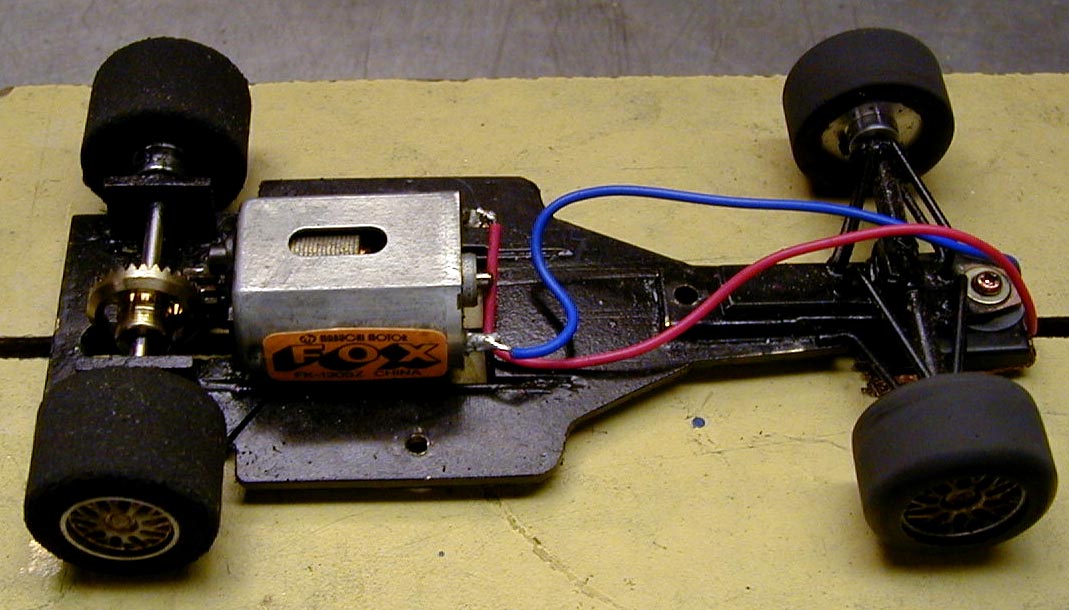
Above is the finished front end. Another problem with the F1 and Indy cars is having enough room for the guide. I looked
at the standard Parma guide I use on most of my cars and saw that guide was a "no go".... But in cases like this I have found
the the trailing guide sold by Bruce Patterson at Patto's was the ticket. The trailing guide is a must have item in
everyones parts bin... The guide allows you to get a nice deep Parma type guide under any car... And will accept the standard
Parma braid.. The front wheels are form Slot-it and have silicone tires.

Now to finish this off on the front I like to use a independent front wheel set up on my cars. As a rule I use stub axles
to do this but with no room in the front end this was not a option. So I used a solid 3/32 axle and soldered a cap on the
end of the axle. With the set screw removed from this wheel and the other set screw lock down this gave me the independent
front wheel set up I like to use.
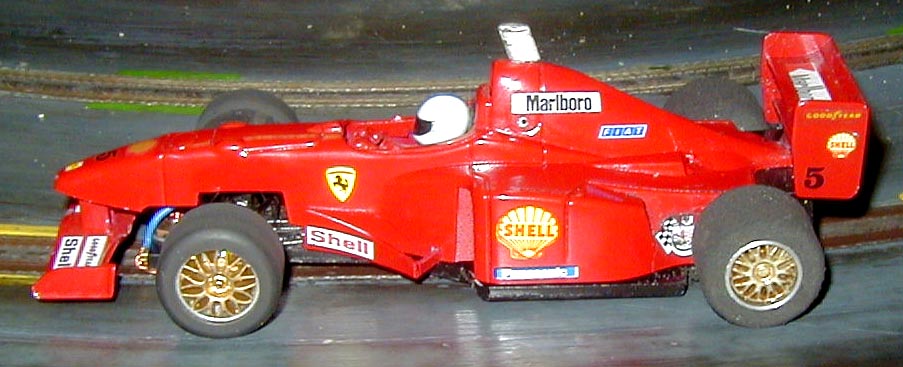
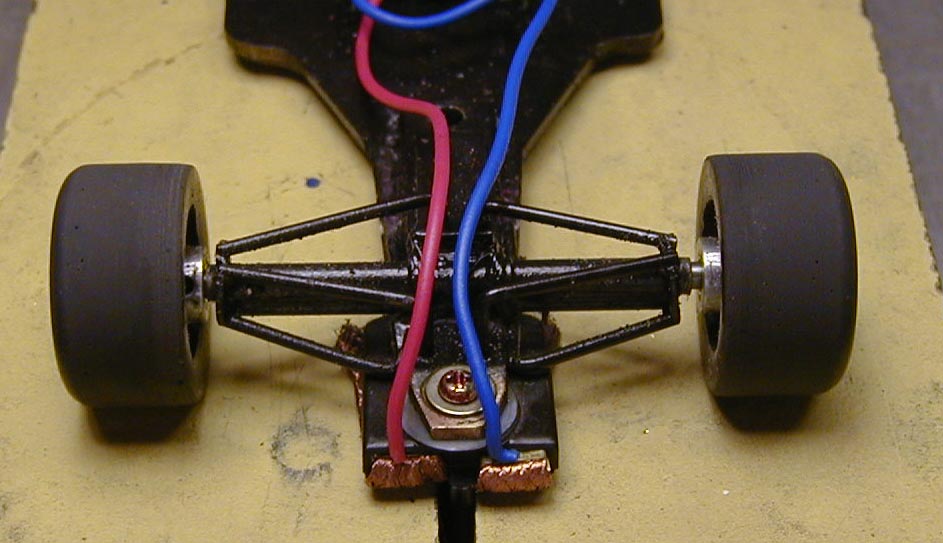
The rear end is completed with a set of PSE "Tuna" sponge tires (13/16) And sonic 64 pitch gears. The front and rear
wheels have some home made resin inserts added.
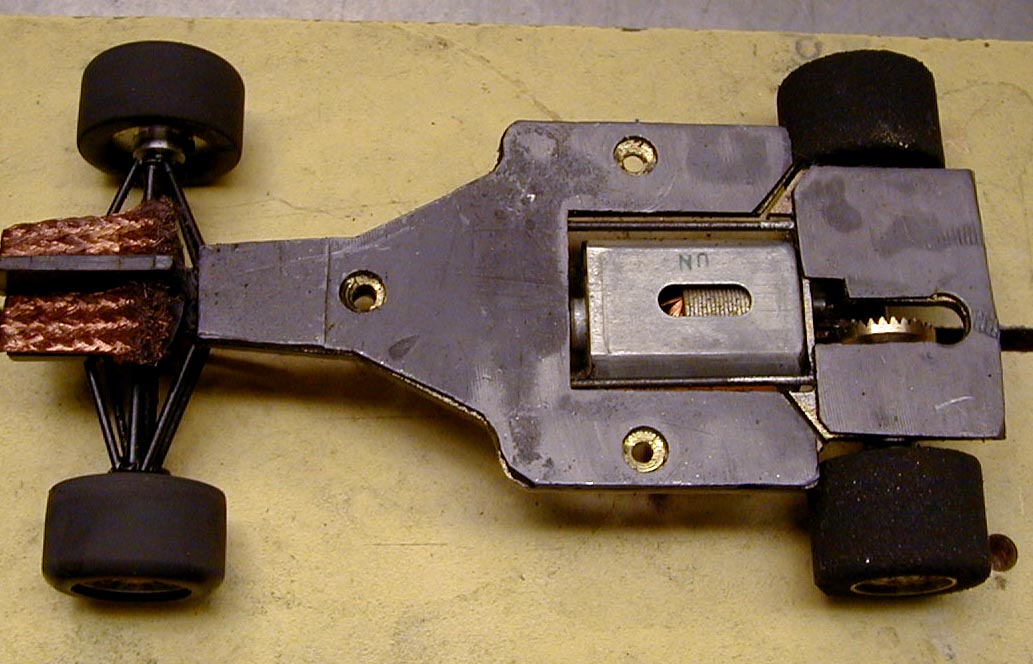
As you can see from the above picture of the bottom of the chassis... There is a slit in the chassis near the rear wheels..
This slit isolates the motor and rear axles form the reat of the chassis and allowes the rear end to flex independently from
the front of the chassis.... making the car handle much better....
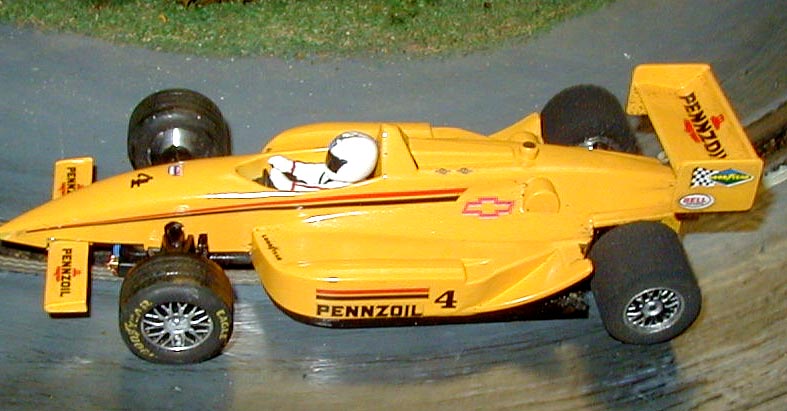
My Indy car entry was built the same as the F1 car. The only difference is that I was able to use the stock front Suspension
unit off the SCX car and just snap it over the front axle tube.
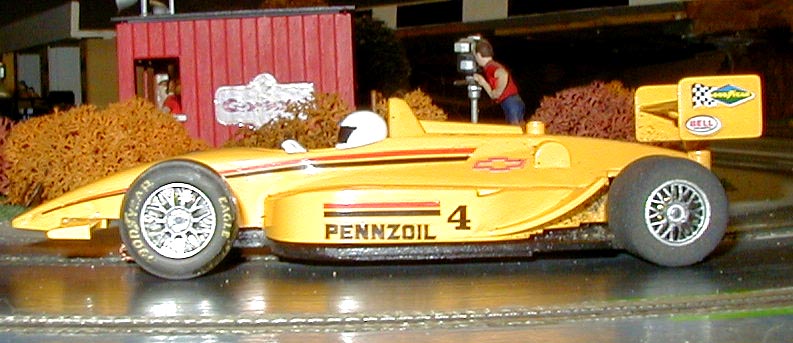
The open wheel cars were a lot more work than I thought they were going to be, but I had a lot of fun building them and
learned a lot along the way..
I am happy to say the both cars did very well and placed 2nd in both classes. The Indy car only loosing by one point
in that class.... And the chassis did a great job on the track winning a number of races..
Phil and Dave from HMCC will have articles up on all the cars that ran in the race on their web site ( see links page
) in a short time.
Enter content here
|