|
Once again this year the guys in the land down under will be hosting the Tassie Tiger Cup Proxy race in Australia...
And this years race is for Sports cars built before 1969...
So for this years event I decided to go with a Strombecker Lotus 30 body on one entry and a Strombecker Ford J car on
my second entry.... Nothing like a two car team to help bring home the bacon :-)))))
|
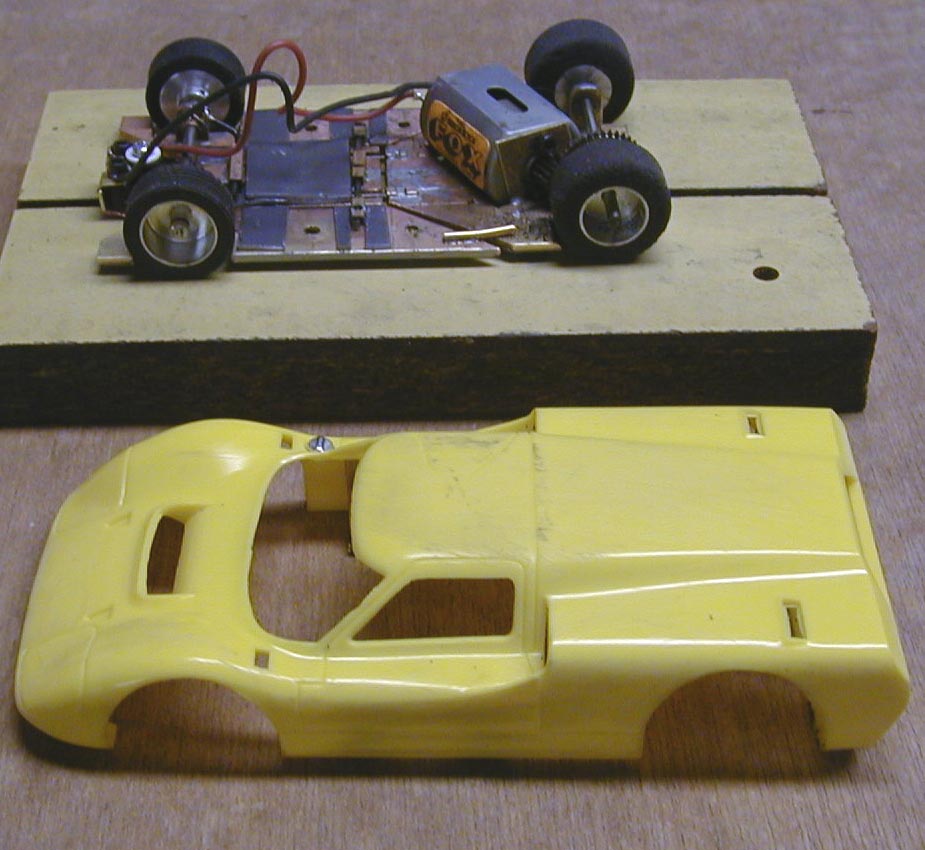
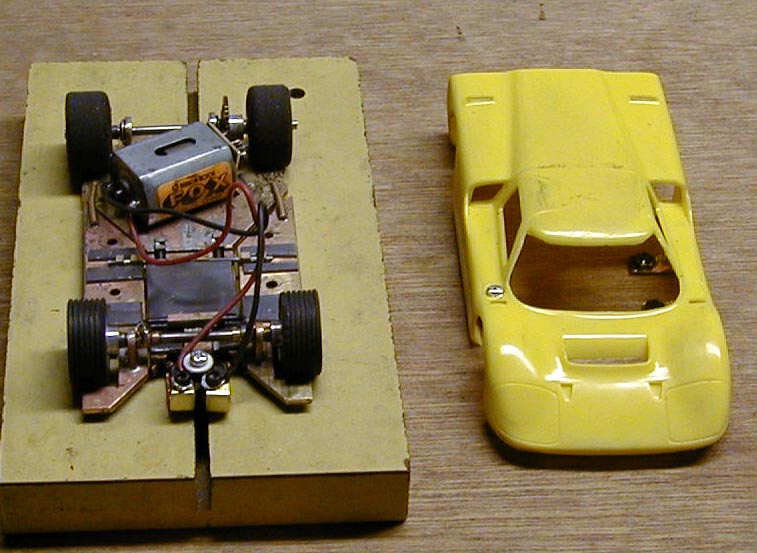
| What I started with |

|
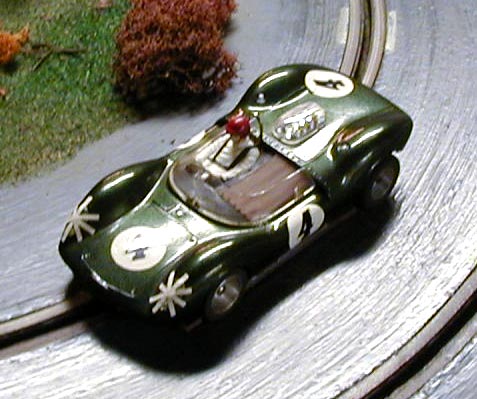
| what I finished with :-) |
This year the chassis is unrestricted and they have left the motor type open to the builders.. But the primary
tests on the cars that they had built suggested a Rabbit or at the most a Fox style motor......
So with that in mind I started on the Lotus 30 first, and wanted to try out my PC board chassis in the real world of
racing.... So the Lotus was designed to use a Fly motor pod mounted to a PC board chassis.. The motor of choise here
was the Slot-it V12 motor (26,000 rpm version)
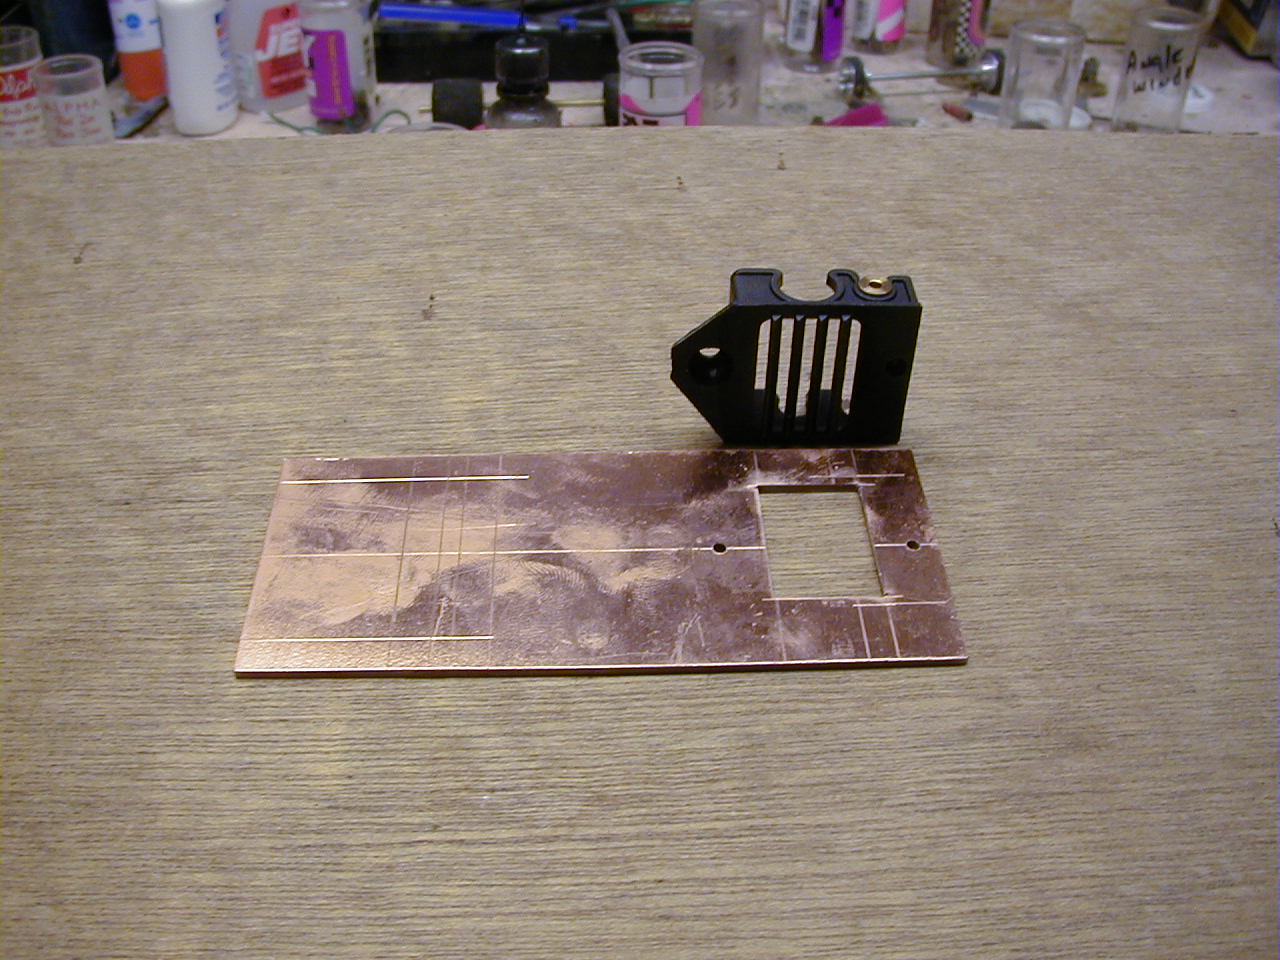
The frist thing that I did was to cut the PC board to the 2" width for my jig... ( that also was the most chassis
that I could get under the body and not be seen front the top of the car...) I then made all my layout lines in the main board
to mark the position of the motor pod and where my front axle carriers would be mounted on the chassis...
And because of the cooling vents on the bottom of the Fly motor pod I also has to mark and cut out a clearence hole for
them... With the hole cut I used double backed tape to secure the pod to the chassis to drill the mounting holes to secure
the pod..... I used the rear hole in the pod and used the magent pocket in the front for my other mounting point..
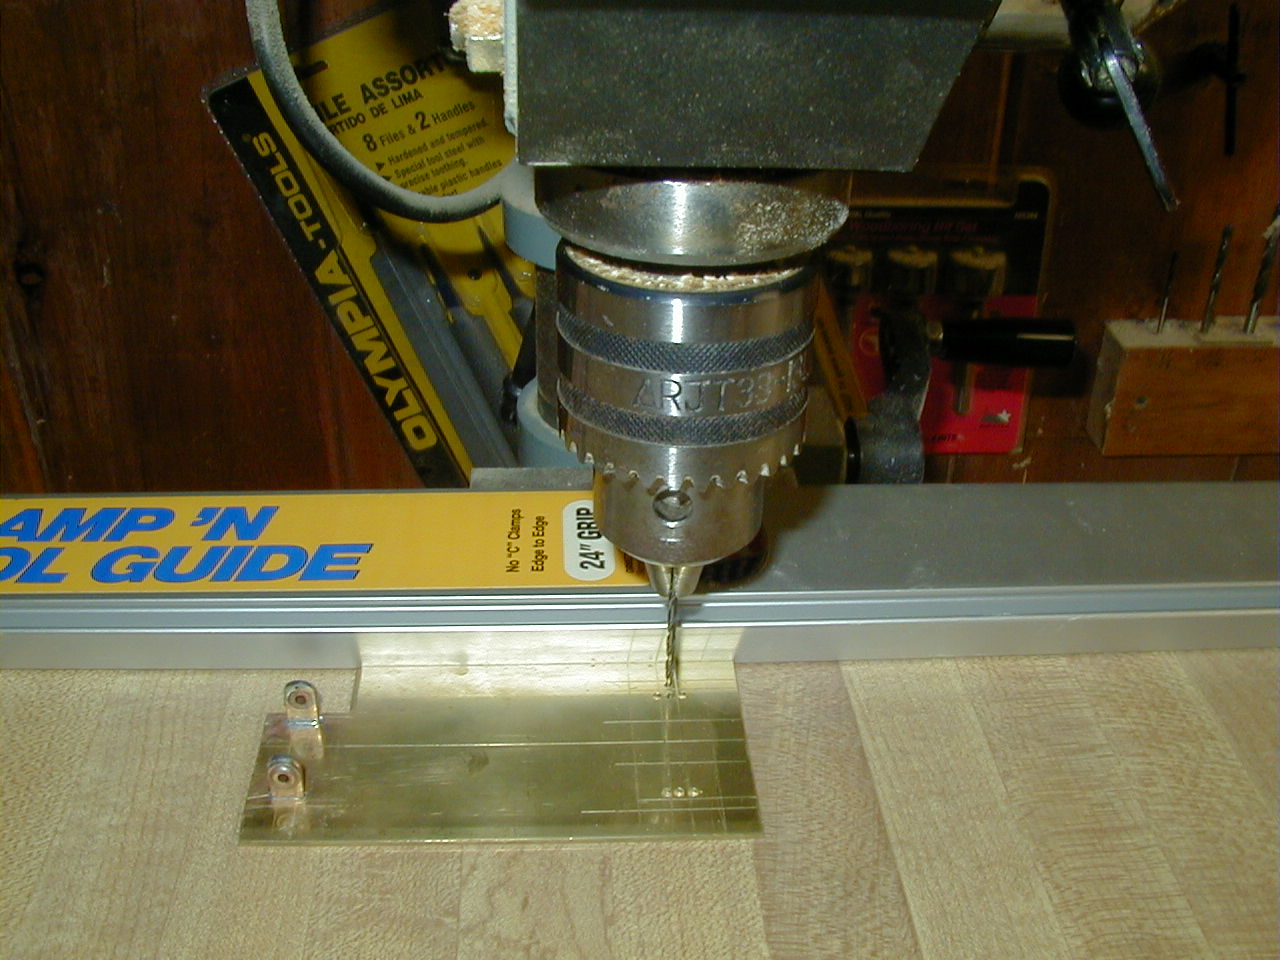
Once the holes were drilled in the chassis for the motor pot I took the chassis over to the drill press to make the slots
in the chassis to hold the front pillow blocks I use for the front axle carriers... The same set up is used on the brass J-car
chassis to make the front and rear Pillow blocks.... I have tried doing this by hand on a vice but have learned that
the drill press and a straight edge is the key to putting the slots in the chassis for the pillow blocks...
As you may remember from the original article on the Pc board chassis, you want to tin all your parts before soldering
them to the chassis.... REMEMBER that too much heat will make the thin copper film on the Pc board seperate from the board..........
Then solder in the front axle carriers as before and then drill and bolt your guide tougne to the chassis....
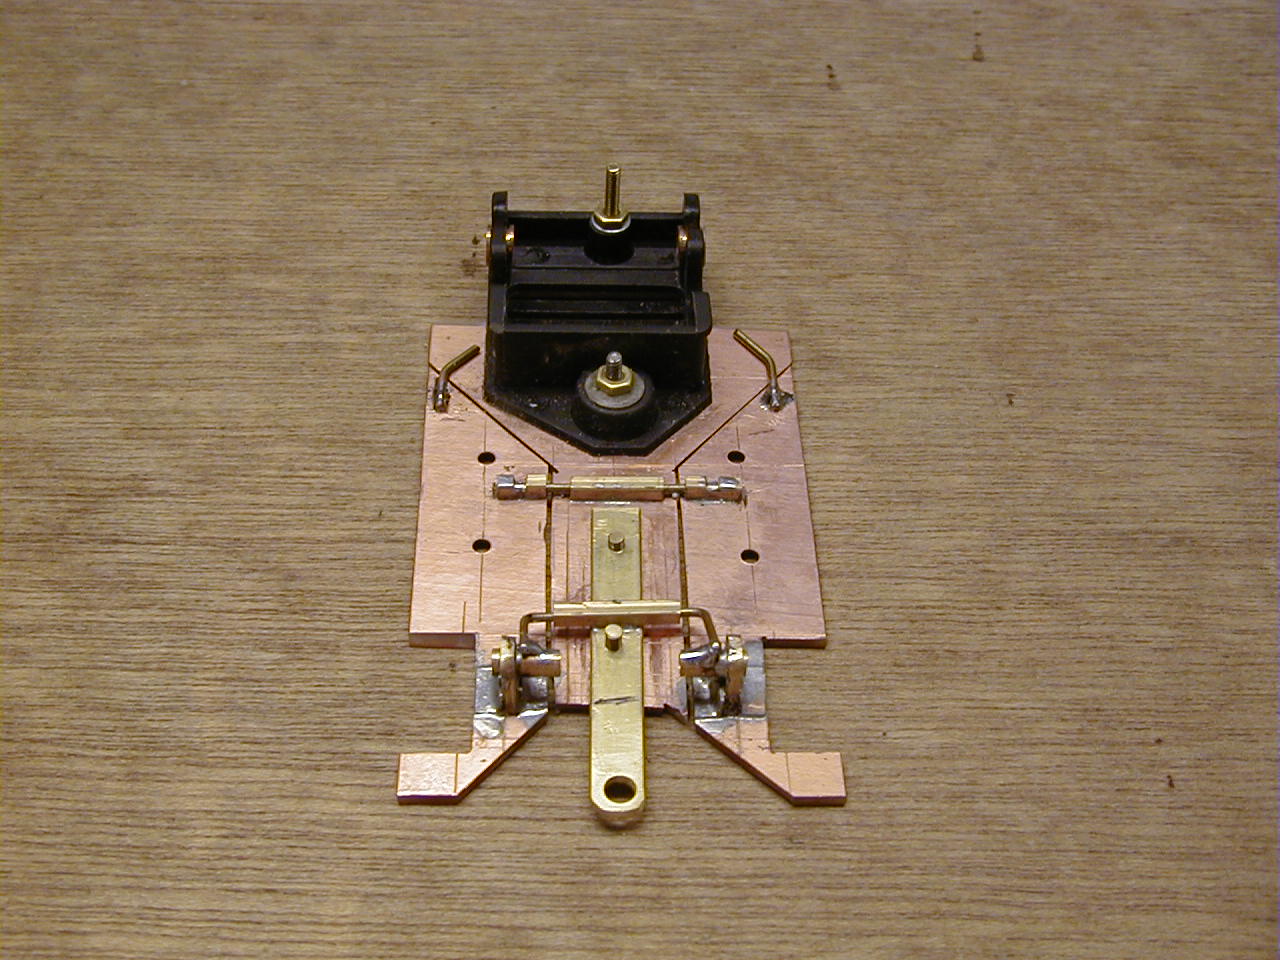
The first Pc board chassis that I did up as a simple pan chassis...... With this one I wanted to see if I could improve
the handling of the chassis by making it a plumber type chassis.... So I cut the center section of the chassis out with a
Dremal tool and then used brass rod and square brass sections to reattach the sides of the chassis back onto the center section
of the chassis..... This has worked well for me on some of the brass chassis that I have been doing up.... And it did
a nice job of making this car better handling than the straight forward pan chassis ....
The rest of the running gear was added using Slot-it front wheels with SCX front tires narrowed to 8mm width... The rear
was set up with a sidewinder Slot-it starter kit and for the rear tires I used Parma #694 20mm tuna tires narrowed to 10mm
in width..... The guide used is one of the Slot-it routed track guides, set up to accept parma braid.. I have used the
new Slot-it routed guide on several of my recent cars and have been VERY happy with the way that the guide works on my track.....
And this type of guide is a must have on many of todays cars if you want to keep the guide hidden under the body........
And
for the finishing touches I added about a pound and a half or lead to the chassis :-))))))))))) Well not that much,
but some lead was added to the chassis........ On my track the Lotus was a very smooth and consistant runner in the 5.8 sec.
range....
The Ford J car was built in much the same way as the Lotus, but the J-car uses a brass chassis in a anglewinder set up.....
And also uses the plumber style chassis but with the piano wire flex treatment for the rear end.........
The J car was about 2 tenths quicker than the Lotus 30 on my track...
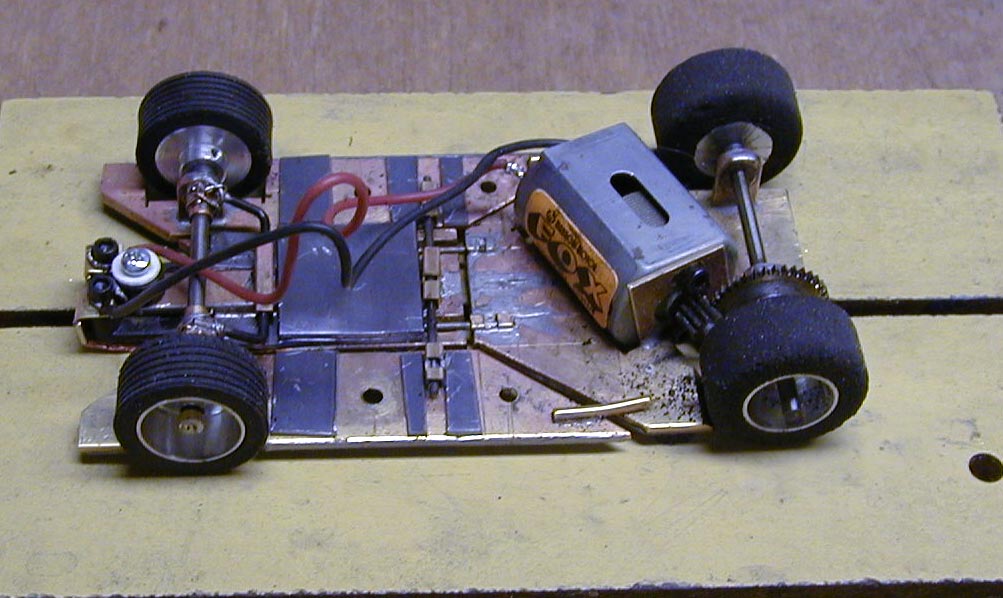
The chassis is set up using a anglewinder design and the front and rear axle carriers are pillow blocks soldered into
slots in the chasssis...... The J car chassis is made out of 1/16" sheet brass. I thought I would give a Fox motor
a try in this car..... The gears are sonic 64 pitch, the front wheels are again Slot-it with SCX tires narrowed to 8mm...
The rears are again Parma #694
20mm tuna tires and on the finished car I have added resin cast wheel inserts from the Monogram
Cobra kit....... And again the Slot-it routed track guide with Parma braid added... And of course just a tad bit of lead to
finish the chassis up....
The Strombecker Ford J is a nice car but as you can see from the car on the left, rather plain in the detail dept..
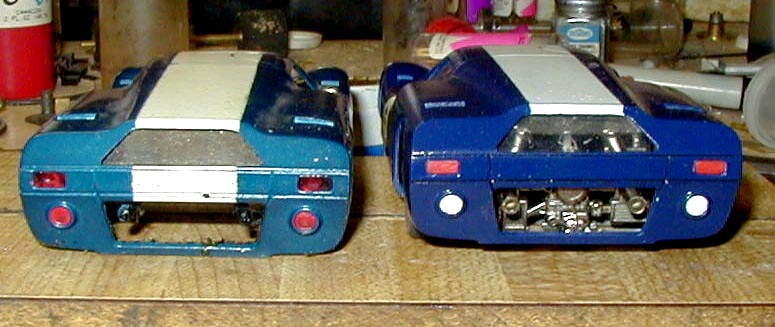
So to get a few more concourse points ( points I really need) I added some rear end detail to the car...........
Henry Ford must be spinning in his grave right about now..... That is a Ferrari 512 rear end hanging on the rear of the J
car :-))))))))))))))))))
I was happy with the way that the car turned out and on the track the Fox motor was a handful to drive.... But after
a little getting use to the car it was turning in 5.6 lap times... Good lap times for my track......
Enter content here
|